Mastering Your First Ride: A Beginner’s Guide to Electric Bikes

Are you ready to experience the thrill of riding an electric bike (eBike)? Whether you’re an experienced cyclist or a complete beginner, getting started with an eBike is easy and fun. In this guide, we'll walk you through everything you need to know to ride your eBike safely and confidently.

1. Understand Your eBike Components

Before hitting the road, it's essential to get familiar with the main components of your eBike:

  • Battery: Provides the power for your eBike to move. It’s typically located on the frame or rear rack.
  • Motor: The heart of your eBike, it helps you pedal with less effort by providing an extra boost. Motors are usually located in the rear wheel hub, mid-drive system, or front wheel hub.
  • Pedal Assist System (PAS): Allows you to control how much assistance you get from the motor as you pedal. You can usually adjust the level of assist via the bike’s display or control panel.
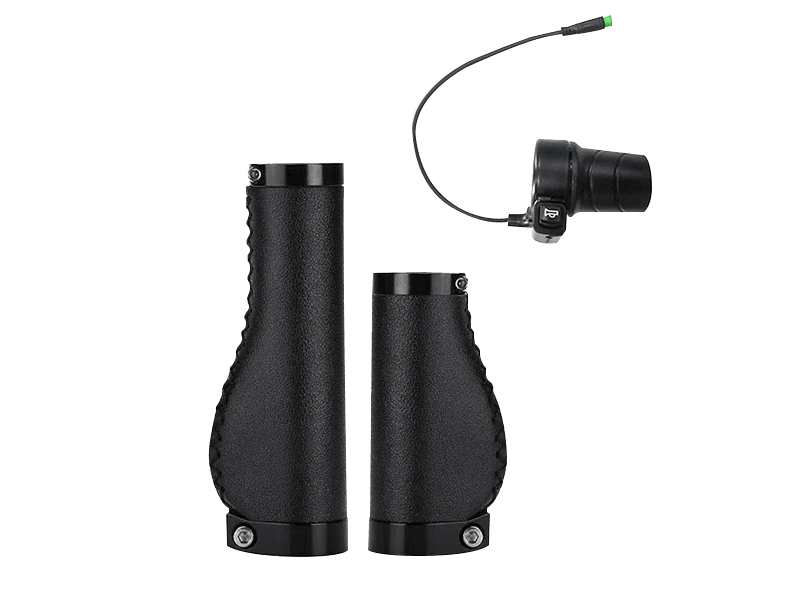
  • Throttle (if applicable): Some eBikes come with a throttle that allows you to accelerate without pedaling. The throttle is typically located on the right handlebar.
  • Brakes: Like any bike, eBikes come equipped with brakes. Learn how your eBike's brakes work before setting off, especially if you’re new to cycling.
  • Display: Your eBike will likely have a display screen that shows battery life, speed, distance traveled, and other important data.

2. Get Comfortable with the Basics

Before taking your eBike on a long ride, it’s important to get used to its power and handling. Here’s what you should do:

  • Check the battery: Ensure the battery is fully charged before you head out.
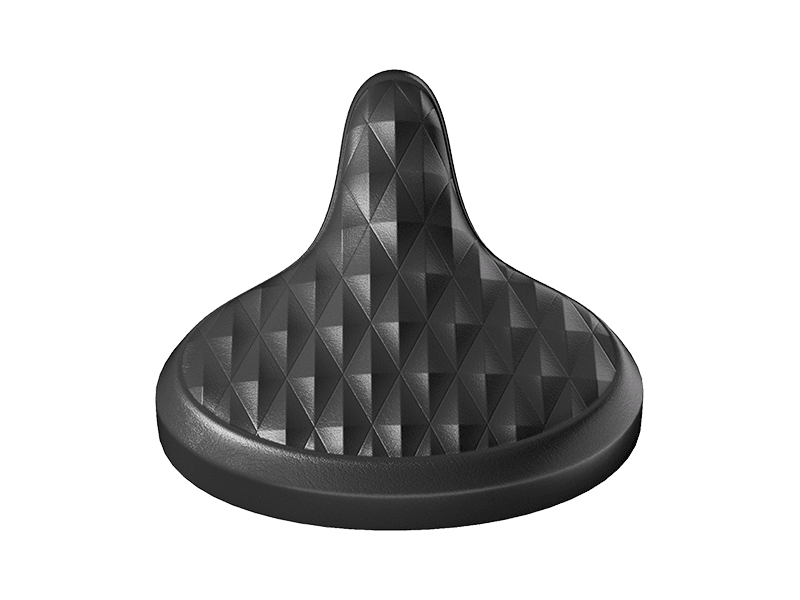
  • Adjust the seat: Make sure your seat height is comfortable, with a slight bend in your knees when your foot is at the lowest point of the pedal stroke.
  • Check tire pressure: Proper tire pressure is essential for safe and smooth riding.

3. Start with Low Pedal Assist

When you’re just starting, it’s a good idea to use a lower level of pedal assist to get a feel for the bike. This allows you to pedal normally and get accustomed to the extra boost from the motor.

4. Use the Throttle (If Available)

If your eBike has a throttle, start by gently twisting the throttle to accelerate. Practice using it in a controlled environment (like a parking lot or quiet street) before using it in traffic. Be sure to go easy on the throttle until you feel comfortable with the bike’s speed.

5. Practice Braking

Take some time to practice braking smoothly. Your eBike’s motor can help slow you down, but you’ll still need to use the brake levers. Apply the brakes gradually and avoid sudden, sharp braking to prevent accidents.

  • Front brake: Use the front brake gently, especially when riding at higher speeds, to avoid tipping forward.
  • Rear brake: Use the rear brake in combination with the front brake for more control.

6. Ride in Different Environments

Once you feel comfortable with your eBike in a controlled setting, it’s time to test it in different environments:

  • Flat Roads: Practice on flat, smooth roads to get a feel for your bike’s speed and handling.
  • Hills: Your eBike is great for tackling hills. Use a higher level of pedal assist to help you power up inclines. Remember, the motor will do most of the work, but you’ll still need to pedal.
  • Downhill: On downhill sections, you can let the motor assist you with braking, but be cautious and always keep both hands on the handlebars.

7. Stay Safe

  • Wear a helmet: Safety should always come first. Make sure you wear a helmet that fits properly.
  • Follow the rules of the road: eBikes are subject to the same rules as regular bicycles. Be mindful of traffic laws and signals, especially if you’re riding in busy areas.
  • Stay visible: Wear bright clothing, use bike lights, and signal when turning to make yourself visible to others.

8. Get the Most Out of Your eBike

As you become more confident on your eBike, here are a few tips to maximize your experience:

  • Manage your battery: Keep an eye on the battery level, especially on longer rides. If you’re running low, switch to a lower pedal assist setting to conserve energy.
  • Maintain your eBike: Regular maintenance, including tire checks, brake inspections, and battery care, will ensure your eBike runs smoothly for years to come.

Conclusion

Riding an electric bike for the first time can be exhilarating and rewarding. With the right knowledge and a little practice, you’ll be cruising around like a pro. Whether you're commuting to work, exploring new places, or simply enjoying a fun ride, eBikes offer a unique and eco-friendly way to travel.

So, get out there, start pedaling, and enjoy the ride!

More Posts

What’s the Difference Between a 750W and a 1000W E-Bike Motor?

Jan 08, 2026

Choosing an e-bike often comes down to one key question: 750W or 1000W?At first glance, the numbers may seem close, but the difference in motor power can significantly affect how an e-bike feels on the road—or on the trail 🚲. Motor wattage influences acceleration, climbing ability, top speed, and even long-term riding comfort. Whether you’re commuting through city streets or tackling steep off-road terrain, understanding these differences will help you choose the right setup for your riding style. What Does Motor Wattage Actually Mean? Motor wattage (measured in watts, W) indicates how much power an e-bike motor can deliver. In simple terms, it reflects how much assistance the motor can provide per second. Higher wattage generally means: - Stronger acceleration - Better hill-climbing ability - Higher potential top speed The reason the market commonly offers 750W and 1000W options comes down to three factors: - Different riding scenarios and user needs - Regional regulations and legal limits - Balancing performance with energy efficiency Unlike traditional bicycles that rely solely on pedaling, an e-bike’s wattage plays a major role in defining the overall riding experience. Performance Comparison: Power vs Efficiency Top Speed & Acceleration - 750W e-bikes typically reach 20–28 mph (32–45 km/h) - 1000W e-bikes can reach 28–35 mph (45–56 km/h) when unrestricted Acceleration also differs noticeably: - 1000W models often reach 20 mph in 8–10 seconds - 750W models usually take 12–15 seconds to reach the same speed This difference becomes especially clear when starting from a stop or riding uphill. Power Output & Torque 750W Motor - Peak output: ~750W - Cruising power at 15 mph: 400–500W - Maximum torque: ~65 Nm 1000W Motor - Peak output: ~1000W - Cruising power at 15 mph: 600–700W - Maximum torque: up to ~85 Nm Higher torque means stronger pulling power, which matters on steep climbs, loose surfaces, or when carrying extra weight. Environmental Factors That Affect Motor Performance Both motor types are influenced by external conditions: - Temperature: Best performance between 60–80°F (15–27°C) - Elevation: Power drops about 3% per 1,000 ft of altitude - Wind: A 15 mph headwind can reduce top speed by 20–25% - Road conditions: Wet or loose terrain may reduce efficiency by 10–15% While both systems remain reliable, a 1000W motor provides more margin under demanding conditions, at the cost of higher energy use. Battery Life: It’s About Capacity, Not Just Wattage Battery Size Matters More Than Motor Rating A common misconception is that higher wattage automatically means shorter range. In reality, battery capacity (Wh) is the key factor. Typical examples: - 750W e-bike: 48V 15Ah battery ≈ 720Wh - 1000W e-bike: 48V 20Ah battery ≈ 960Wh Manufacturers usually pair higher-power motors with larger batteries to compensate for energy demand. Real-World Range Expectations In everyday city riding: - Both 750W and 1000W e-bikes can achieve similar ranges when batteries are sized appropriately - Frequent full-throttle riding reduces range on both - Hills, wind, and rider weight affect range regardless of motor size Key takeaway: Don’t judge range by motor wattage alone—always check battery capacity. Cost and Weight Differences Higher Power, Higher Cost 1000W e-bikes are generally more expensive due to: - More powerful motors - Larger, costlier batteries - Reinforced frames - Stronger brakes and upgraded components Maintenance costs can also be higher, especially when replacing larger batteries over time. Added Weight - 750W e-bikes: ~45–55 lbs - 1000W e-bikes: ~55–65 lbs The extra weight mainly comes from the motor, battery, and reinforced structure. This can make a difference when lifting the bike, carrying it upstairs, or maneuvering at low speeds without motor assistance. Which One Is Right for You? 750W E-Bikes: Ideal for Daily Riding Best suited for: - City commuting - Bike lanes and urban traffic - Riders prioritizing efficiency and lighter handling They offer a balanced mix of power, range, and compliance with local regulations 👍. 1000W E-Bikes: Built for Demanding Conditions Best suited for: - Steep hills and mountain roads - Off-road trails and rough terrain - Heavier riders or frequent cargo loads You get stronger performance and faster acceleration, with the trade-off of higher cost, weight, and energy use. Final Thoughts: Choose Power Based on How You Ride The right motor isn’t about choosing the biggest number—it’s about matching power to real-world use. - Choose 750W if you value efficiency, lighter weight, and daily practicality - Choose 1000W if you regularly face steep climbs, heavy loads, or challenging terrain Consider your riding environment, local regulations, and budget before deciding. The right choice will make every ride smoother, safer, and more enjoyable 🚴.

Read More

Motor Core Maintenance

Jan 05, 2026

1. Why Nylon Gears Are Used for the Clutch Instead of Metal a. Vibration and Noise Reduction Motor vibration and noise largely come from the rigid impact during gear meshing. Metal gears are hard and low in elasticity, so they cannot absorb impact effectively, often producing high-frequency vibrations and noise. Nylon gears, on the other hand: - Have high toughness and elastic deformation capability, reducing vibration transmission. - Feature a lower surface friction coefficient, further decreasing operating noise. b. Lightweight Design Nylon gears are lighter than metal gears, which provides several benefits: - Reduces motor starting current by ~15%. - Lowers energy consumption during continuous operation by 8–10%. - Decreases radial load on motor bearings, extending bearing service life and improving overall motor efficiency. c. Corrosion Resistance and Chemical Stability Motor cores may encounter moisture, oil, or mildly acidic/alkaline environments. Metal gears can corrode, leading to transmission failure. Nylon gears offer: - Excellent chemical stability. - Resistance to water, oils, salt spray, and most organic solvents. - No rust formation unless exposed to strong oxidizers or high-temperature strong acids/alkalis. d. Electrical Insulation Motor cores contain energized components like coils and brushes. Metal gears touching these parts can cause electrical leakage, posing a safety risk. Nylon is an electrical insulator, preventing current conduction and reducing leakage risk at the design level. 2. When to Disassemble the Motor Core for Maintenance - Increased Noise: If the motor becomes louder than usual, inspect the core for insufficient lubrication grease. - Routine Inspection: Replenish grease every 600–800 miles of riding. - Rainy Season Maintenance: After long-term riding in wet conditions, inspect metal components for rust. Lightly polish affected areas with sandpaper and reapply lubrication grease if needed. 3. Lubrication Grease Selection Criteria - Operating Temperature Range: –20°C to 45°C - Below –20°C: Grease thickens: solidifies around –45°C. - Above 45°C: Grease thins: fully liquefies around 80°C. Selection Guidelines: Choose grease that is: - High-temperature resistant - Low-temperature resistant - Waterproof

Read More

Cycling with Arthritic Knees: How E-Bikes Can Help

Jan 02, 2026

Arthritis can make everyday activities, including walking, painful. It affects many people—one in four Americans experiences chronic knee pain. The good news? The right kind of exercise can protect your joints and relieve pain, rather than making it worse. Low-impact exercises are particularly important for arthritic knees, and cycling is one of the best options. It improves cardiovascular health, strengthens muscles, increases mobility, and provides a good workout without the heavy impact of running or high-intensity training. Electric bikes (e-bikes) offer added comfort. Their motor assistance lets you adjust how much effort is needed for each pedal stroke, reducing strain on your knees and making rides more enjoyable and longer-lasting. This guide explores why cycling—especially with an e-bike—is excellent for those with knee arthritis and highlights key features to look for in a bike that promotes comfort and minimizes knee strain. Why Cycling Is Beneficial for Arthritic Knees - Low-Impact Activity: Cycling puts minimal stress on your knees. Unlike running, it allows the knee to move smoothly through a controlled range of motion, improving flexibility and reducing stiffness. - Strengthens Muscles: Pedaling works the quadriceps, hamstrings, and calves, supporting the joint and easing discomfort. - Improves Mobility & Stability: Stronger muscles around the kneecap help carry body weight efficiently, reducing pressure on arthritic joints. - Supports Weight Management: Excess weight adds stress to knees—cycling can help maintain a healthy weight, easing joint burden. (Every 10 pounds of body weight adds 15–50 pounds of pressure on the knees.) Cycling as a Cardiovascular Exercise - Heart Health: Cycling improves circulation, lung capacity, and overall cardiovascular fitness. - Low-Impact Cardio: Provides efficient cardiovascular exercise without stressing the knees. - Weight Control: Helps manage weight, reducing arthritis symptoms and improving mobility. Versatility for All Fitness Levels Cycling adapts to different fitness levels: - Recumbent Bikes: Reduce knee pressure for beginners. - Upright Bikes: Suitable for more experienced riders. - Stationary Bikes: Indoor option for bad weather. - Outdoor Cycling: Offers mental health benefits—stress reduction, improved mood, and a sense of achievement. - Electric Bikes: Adjustable pedal assistance allows a customized workout—more help for hills, relaxed rides on flat terrain. Key Features to Look for in a Bike for Arthritic Knees 1. Adjustable SeatFine-tune saddle height and position for a comfortable, supportive posture, reducing knee strain. 2. Low-Frame HeightModels like Ranger M-540, Wild Cat Ultra A-340, Rocky Pro A-320 have low-step frames, making mounting and dismounting easier and safer. 3. Smooth Gearing SystemLow gears and adjustable resistance let you pedal comfortably without excessive force, protecting your knees. 4. Electric Assist System5-level motor assistance helps take the load off your knees. Adjust intensity to match terrain and comfort level. Tips for Biking with Arthritic Knees - Invest in Cycling Gear: Helmet, gloves, eye protection, bright clothing, and comfortable form-fitting clothes. - Warm-Up First: Light stretches and joint mobility exercises prepare your knees. - Start Small: Begin with 5–10 minute rides at low resistance; gradually increase duration and intensity. - Stretch Daily: Pre- and post-ride stretches improve flexibility and mobility. - Stop if You Feel Pain: Adjust seat or riding position; consult a professional if discomfort persists. Summary Freesky electric bikes are designed for riders with knee arthritis. Features like adjustable seats, low-step frames, smooth gearing, and electric assist provide a comfortable, customizable riding experience. Whether you're a beginner or seeking low-impact exercise, Freesky e-bikes let you ride longer and more comfortably while protecting your knees.

Read More